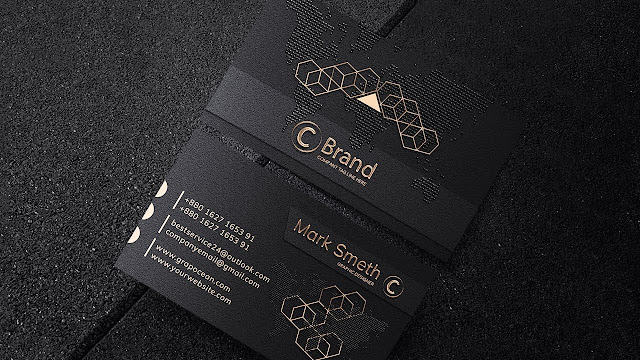
How to Design a Dark Business Card in Photoshop

Dark-themed business cards can leave a lasting impression, offering a sophisticated and sleek design. In this complete tutorial, you’ll learn how to create a professional dark business card using Adobe Photoshop. Whether you're a designer working for a client or making your own business card, this guide will walk you through each step. From setting up the document to applying the finishing touches, you’ll have a bold and elegant card ready to print. Let’s get started!
Why Choose a Dark Business Card?
A dark-themed business card exudes professionalism, mystery, and class. It is the perfect choice for individuals or businesses looking to stand out. Black, dark gray, or deep hues paired with opposite text and accents create an eye-catching design. A well-designed dark business card represents more than contact information; it communicates a strong, memorable brand.
"A business card is more than just a card; it’s your brand’s first impression—make it bold and unforgettable."
What You Will Need
- Adobe Photoshop (any version)
- Basic knowledge of Photoshop tools
- A creative concept for your business card
- Optional: High-quality logo or graphic elements
Step-by-Step Guide
Step 1: Set Up Your Document
Open Adobe Photoshop and create a new document. For print quality, set the dimensions to 3.5 inches wide by 2 inches tall and a resolution of 300 DPI. Be sure to incorporate a 0.125-inch bleed on all sides to guarantee a flawless result after the printing process. This increases the overall dimensions to 3.625 inches by 2.125 inches.
Step 2: Choose a Dark Background
Fill the background layer with a dark color. Use the Paint Bucket Tool (G) to apply a solid color, such as black, charcoal gray, or deep blue. Alternatively, you can use a texture or gradient background for added depth and complexity.
Pro tip: Textured backgrounds such as carbon fiber or brushed metal work exceptionally well with dark-themed designs.
Step 3: Add Your Logo and Contact Information
To incorporate your company logo, navigate to the "File" menu and select "Place Embedded". Ensure that the logo is distinct from the dark background. Modify its dimensions and positioning as needed.
Use the Text Tool (T) to input your contact details, such as name, job title, phone number, email, and website. Choose simple, sans-serif fonts like Helvetica or Arial. White or light-colored text will ensure readability against the dark backdrop.
Step 4: Add Visual Elements
Enhance your designs by adding elements like lines and icons using the Shape Tool (U). Thin, light-colored lines can help separate sections of your card, adding structure and balance. Consider adding a subtle pattern, watermark, or emblem to enhance the visual appeal without overpowering the primary design.
Pro tip: Keep the design minimalistic. When a business card is too cluttered, it can distract from the important contact information and create an impression of disorganization.
Step 5: Final Touches and Alignment
Make sure all elements are aligned. Use the Align tool and Guides (View > New Guide) to ensure perfect placement of your text and graphics. Check the contrast between your text and background. Adjust the brightness or opacity if necessary to maintain readability. For a final touch, consider adding a finishing effect, such as a slight shadow or embossing, to give your card a polished look.
Step 6: Save Your Business Card
To ensure that you save your work for future editing, remember to save your file in PSD format by following these steps: File > Save As > PSD.
To prepare for printing, save a copy as a PDF or JPEG with high-quality settings. If you intend to submit the design to an online printing service, adhere to their file specifications.
Key Takeaways
Important Tips:
- Use High-Contrast Text: Make your text pop with vibrant and bold color palettes to ensure optimal visibility against a dark background.
- Minimalism Wins: Less is more with dark designs. Avoid overcrowding your business card with too many elements.
- Choose Fonts Wisely: Stick to professional, legible fonts. Bold fonts can work well for headers, but overall readability is essential.
- Professional Printing: For the best-printed results, choose matte or glossy finishes and high-quality paper when using professional printing services.
Your download link will appear in 60 seconds.
Conclusion
Designing a dark business card in Photoshop is an exciting assignment. By following the steps outlined in this tutorial, you can create a professional, eye-catching business card that will make a lasting impression. Whether starting this for your brand or a client, remember to keep the design sleek, balanced, and functional. Now it's time to bring your design to life and share it with the world!
If you have any quary let me know