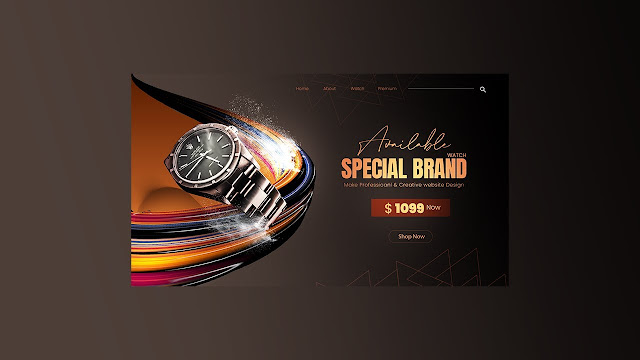
How to Design E-commerce Website Watch Product Banner for Hero Section in Adobe Photoshop

Creating a standout product banner for an e-commerce website's hero section can boost engagement and conversions. In this tutorial, we'll walk you through designing a product banner for a watch using Adobe Photoshop. From setting the dimensions to applying stylish design elements, we'll guide you to craft a visually stunning banner for your e-commerce website.
Why an Effective Hero Banner Matters
The hero section is the first thing users see on your e-commerce website. A visually appealing product banner can draw immediate attention, highlight your product's features, and encourage users to explore further. For luxury products like watches, the design must exude elegance and sophistication.
"A well-crafted hero banner doesn't just present a product; it tells its story and connects with the viewer emotionally."
What You Will Need
- Adobe Photoshop (any version)
- High-quality product images of the watch
- Creative vision for the layout and typography
Step-by-Step Guide
Step 1: Set Up Your Document
- Open Adobe Photoshop.
- Go to File > New and set the dimensions to 1920 pixels wide by 1080 pixels tall.
Step 2: Import and Position the Watch Image
- Use File > Place Embedded to import your product image (the watch).
- Position the watch on one side of the banner, ensuring enough space for text and branding elements.
Step 3: Add a Background
- Choose a background that complements the product. For luxury items like watches, subtle textures or gradients work well.
- You can also use the Gradient Tool to create a smooth transition of color behind the watch.
Step 4: Add Text and Branding Elements
- Select the Text Tool (T) and type the product name or a catchy slogan highlighting its uniqueness.
- Use clean, elegant fonts to maintain a luxurious feel. Align the paragraph to balance with the watch's placement.
Step 5: Include Call-to-Action (CTA)
- Create a visible and compelling CTA. Phrases like "Shop Now" or "Discover More" work well.
- Place the CTA in a prominent location and use a button style with a contrasting color to draw attention.
Step 6: Finalize and Export
- Review the overall design to ensure all elements are aligned and visually balanced.
- Go to File > Export > Save for Web (Legacy) and choose JPEG format for web usage.
Key Takeaways
Remember:
- Consistency: Ensure that your banner aligns with the overall theme and branding of your e-commerce site.
- High-Quality Images: Always use high-resolution images for a polished, professional look.
- Call to Action: Make the CTA stand out to guide users towards conversion.
Your download link will appear in 60 seconds.
Conclusion
Designing an effective product banner for your e-commerce site's hero section can significantly improve user engagement and drive conversions. Discover the secrets to creating stunning and professional banners for any product with this easy-to-follow Adobe Photoshop tutorial! Please ensure to experiment with colors, typography, and layout to capture the true spirit of your brand in an authentic way.
If you have any quary let me know