Dear viewers, greetings and welcome to Grapocean. After a long time, I came to you again with a new beautiful tutorial. The topic in today's tutorial is how to design a professional Instagram post layout design in adobe photoshop. Here I have tried to explain the details. So let's start the main tutorial without delay.
How Could I Make Instagram post layout design?
In this tutorial, I will discuss a single post design way. You will
usually see different styles of
Instagram posts
online. There are different types of posts on Instagram. There are
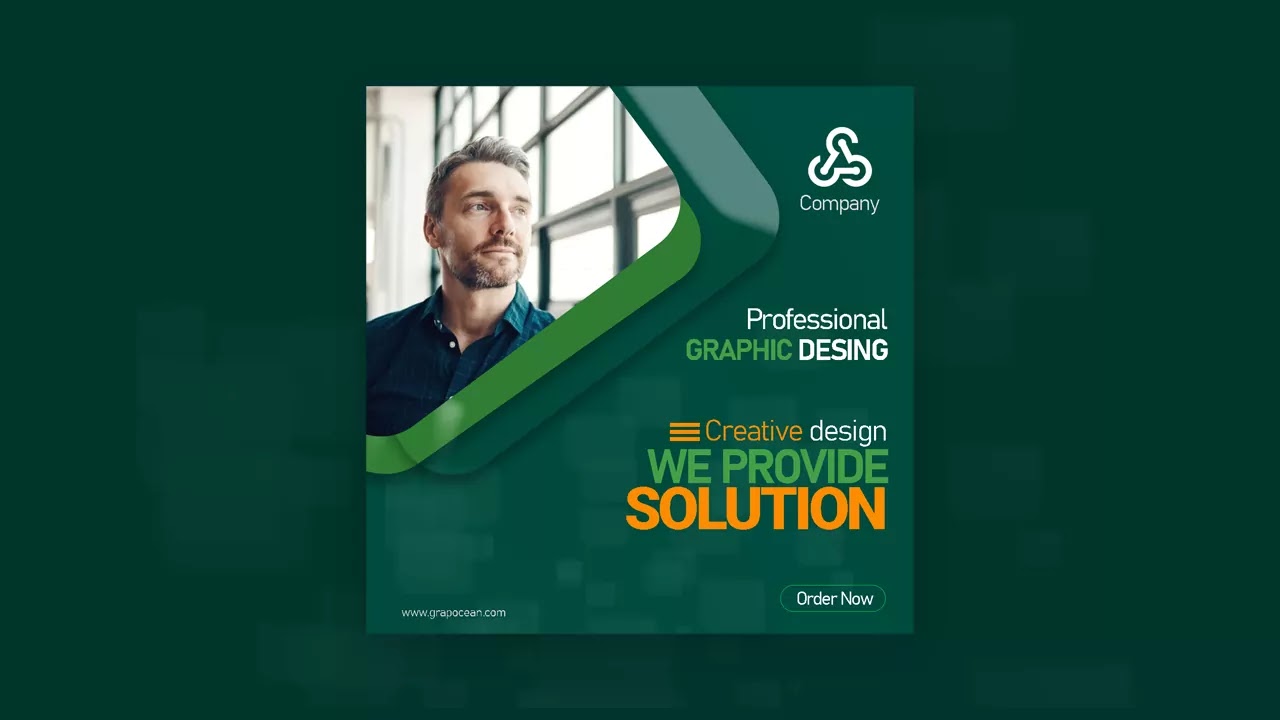
different types of designs based on the category. Looking at the Instagram
post template in this tutorial today, it is a service-related Instagram
post. This is a corporate social media post. I used an updated version of Adobe Photoshop to design this template.
Today, as every day, I have used three colors of the design.
Template Important information
- Size : (Hight x wide)- 1080 x 1080
- Bleed Area : Not necessary
- Resolution : 300 ppi
- Color Mode :RGB
- Template type : PSD,PDF,JPG,
- Font Names: Akrobat
-----Tutorial Stock files -----
Design steps of the Instagram post design-
-Step 1
In the first step of the design, we will create a design artboard according
to the size of the Instagram post. You can also make a grid line on the
design artboard to make the design convenient.
-Step 2
After Making the design artboard bring the model photo to the design artboard by pressing Ctrl+shift+O. Now transform the model image size smaller or bigger press Ctrl+T or go to Edit>Free Transform.
-Step 3
Go to the photoshop Right-hand toolbar and click on the Rectangle tool.
Make a quadrilateral shape and carve the shape corner to round from the
shape properties. Now make three copies of the shape. now bright the
model photo layer on the top and make a clipping mask with its bottom
layer. That means clipping the mask with the quadrilateral shape.
-Step 4
Now apply color and emboss effect on quadrilateral shape, to do this select make the layer active by clicking on the
layer thumbnail and going to its Blending option properties. from
there check the Bevel and Emboss option and color overlay pick a bevel
style to make the glossy effect on the shape. in the same way.
-Step 5
Step five makes a beautiful background. Click on the Brush tool or
go to windows > brush setting. from there pick
up a four rectangle shape brush. if you don't find this type of brush you
can create your own. to do this make a transparent artboard and make a
black fill rectangle shape. Now go to
Edit>Define Brush Preset and save your brush. after that
again go to the brush settings and increase the brush spacing to make
multiple. . To show the result. you can customize the all brush setting to
see the final output results. Once the brush is made to suit your
mind, paint the brush over the design artboard. Now you will see some
randomized shapes style created. Now decrease the brush layer opacity to
match the background. Now bring the logo and type all design text
(example- heading, subheading, etc).
Thank you for being patient with us for so long. Keep creating new things on adobe photoshop. Hope you have
benefited a lot from this Instagram post layout design tutorial
today. If you like this tutorial share it more with your friends and
native.
If you have any quary let me know