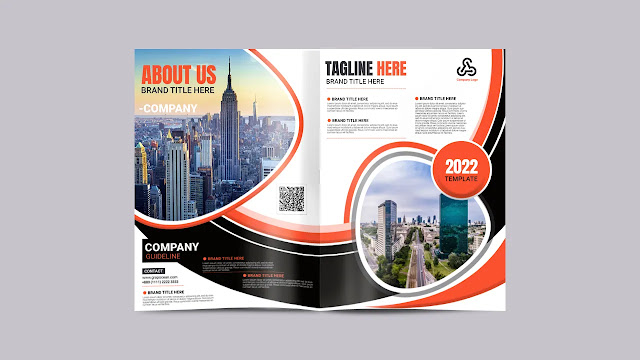
Welcome to Grapocean. Today we reached up with another fabulous tutorial for you. This tutorial is about designing a professional bi-fold brochure in adobe photoshop cc. Before we make the brochure, let's know some essential information about the double-fold brochure.
A bi-fold brochure is a sort of flyer that is naturally published on a standard sheet of 8.5” x 11” inches (A4) paper, then folded in the same half to create a four-page leaflet. The two inside panels are usually printed with information or advertisements, while the outdoor boards typically contain contact information or a call-to-action.
Creating a bi-fold brochure in Adobe Photoshop is a somewhat comfortable process. That can be made in just a few actions.
- Size : (width x height)- A4 2 part
- Bleed Area :(up x down x left x Right) - 25pixel x 25pixel x 25pixel x 25pixel
- Safe Area: (up x down x left x Right) - 50pixel x50pixel x 50pixel x pixel
- Resolution: 300 DPI
- Color Mode: CMYK
- Template type: PSD, PDF, JPG,
- Font Names: Babies
Business Bi-Fold Brochure Template Desing in photoshop
First, Open a new Photoshop document and set the dimensions to 8.5”x 11” inches a4 size. Next, create two separate layers for the front and back of the brochure. This will make it easier to design each side independently. You can also use a ruler guide and create a merged document. Just click on Image > Canvas size (Alt+Ctrl+C).
You can identify the artboard through a ruler guide. You can follow any method of your choice here. Begin creating the front of the brochure on the “Front” layer. When you’re done, move on to the “Back” layer and design that side of the broch. However, after Making the design artboard let's make some eye-catching shapes. To make the shape go to the photoshop right-side toolbar and click on the Ellipse tool to instantly draw a round stroke outline and pick a black color. Now create a few copies of the layer by pressing ctrl+J. And decrease the thickness of the stroke outline. Now, change the color of the one-stroke shape to orange. Again make a circle shape, this time keep the fill one and stroke off. Now drag and drop the city image that I use in the design. Now make a clipping mask with the fill shape. After that top menu Edit>Transform Path>Warp in the warp choice "Arc" transform. In the same method complete the 2nd one.

If you have any quary let me know